Warehouse Layout Guide: Optimize Space & Efficiency
August 4, 2026
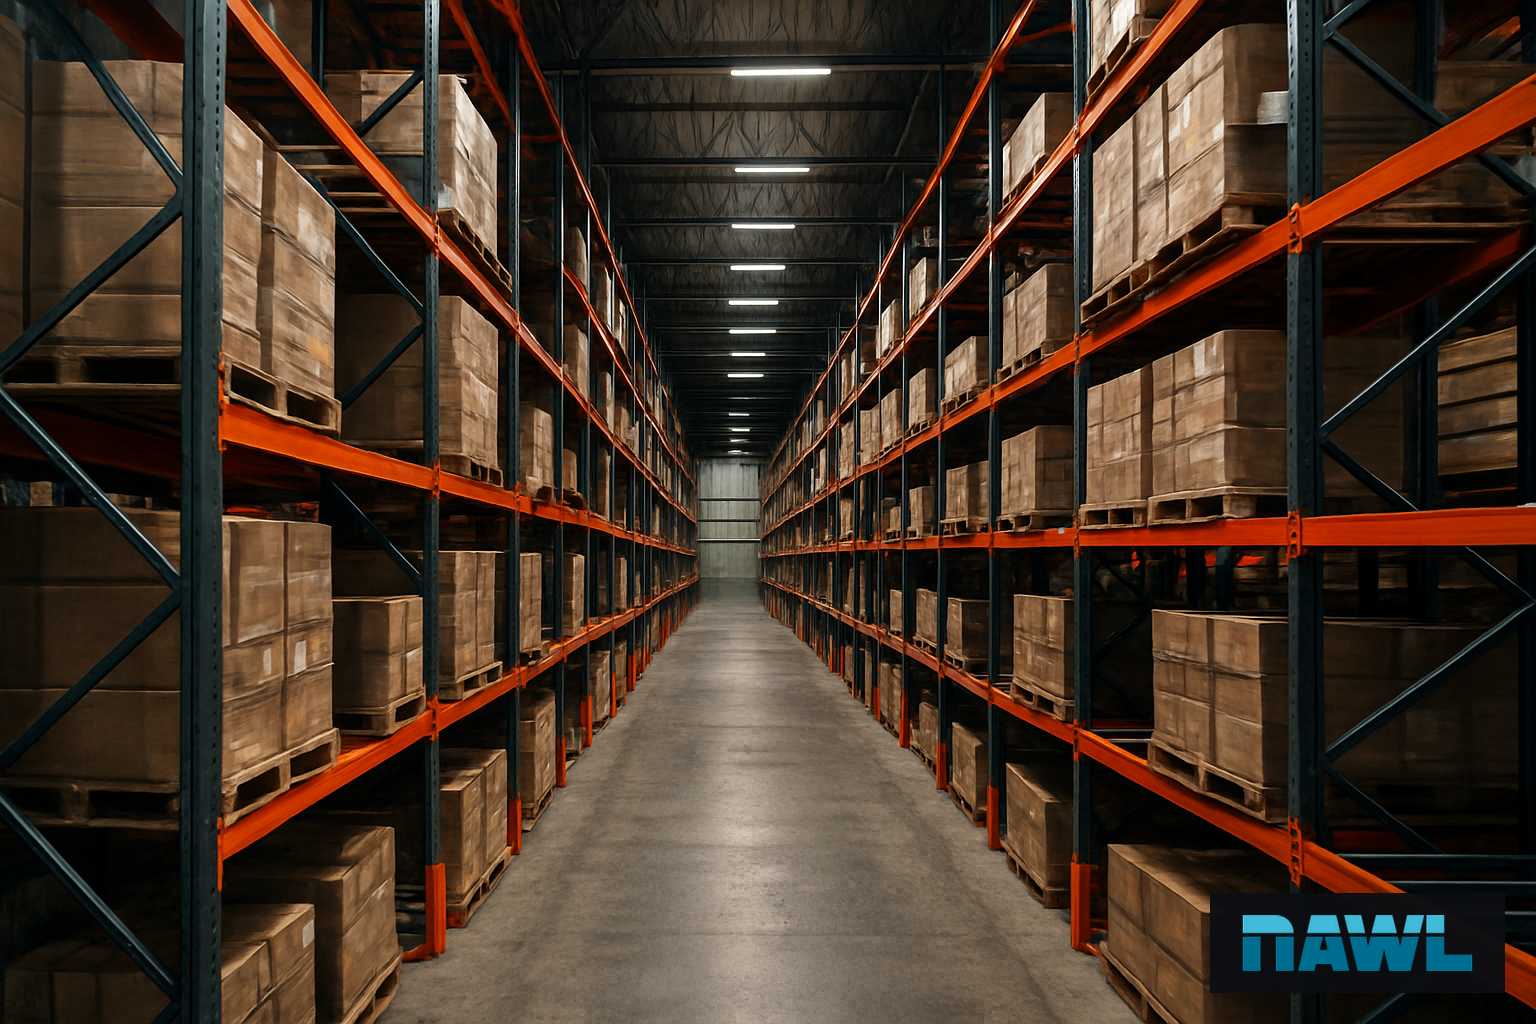
Effective warehouse layout is fundamental to operational efficiency and profitability. A well-designed layout minimizes travel time, maximizes storage density, and improves overall workflow. Conversely, a poorly designed layout can lead to bottlenecks, increased labor costs, and reduced throughput.
A useful warehouse layout guide starts with one point: the best layout is not always the one with the most pallet positions. The right design supports the way product actually moves through the building. That means matching storage media, aisle width, dock space, lift equipment, picking methods, and safety clearances to the operation. A distribution center layout built for full-pallet inbound and outbound traffic will look different from a warehouse that breaks pallets for case picking, e-commerce replenishment, or parts storage.
Before laying out rack rows, gather the basics: building dimensions, clear height, column grid, dock locations, slab condition, fire protection limitations, forklift type, pallet size and weight, SKU count, inventory turns, and order profile. These inputs drive pallet rack layout, not the other way around.
Understanding Aisle Widths
Aisle width directly impacts equipment selection and storage density. Reach trucks and narrow-aisle vehicles require significantly less space than traditional counterbalance forklifts. While narrower aisles increase storage capacity, they also demand more specialized and often more expensive material-handling equipment.
Typical aisle widths range from 8 to 12 feet for narrow-aisle equipment and 10 to 14 feet for standard forklifts. Considerations should include turning radius, mast height capabilities, and the type of pallet-rack system in use. Careful planning here prevents costly operational friction later.
Aisle width should be confirmed with the actual lift truck model, attachment, load length, and pallet orientation. A truck with a standard mast and forks may need less room than the same truck equipped with a side shifter, fork positioner, clamp, or unusually long forks. Pallet overhang also matters. A 48-inch-deep pallet stored in a 42-inch-deep rack creates overhang that affects the working aisle and rack-to-rack clearance.
Common planning ranges are useful, but they are not a substitute for equipment data:
| Equipment type | Common aisle range | Typical use case | Layout tradeoff |
|---|---|---|---|
| Counterbalance forklift | 10 to 14 feet | General warehouse use, dock work, flexible handling | Lower storage density, simple equipment fleet |
| Reach truck | 8 to 12 feet | Selective rack in narrower aisles | Higher density, requires trained operators |
| Very-narrow-aisle turret truck | Often under 8 feet, depending on system | High-bay storage with guided equipment | High density, higher equipment and floor requirements |
| Pallet jack or walkie | Varies by pallet and traffic | Staging, short travel, floor-level picking | Low cost, limited lift height |
Counterbalance forklift
- Common aisle range
- 10 to 14 feet
- Typical use case
- General warehouse use, dock work, flexible handling
- Layout tradeoff
- Lower storage density, simple equipment fleet
Reach truck
- Common aisle range
- 8 to 12 feet
- Typical use case
- Selective rack in narrower aisles
- Layout tradeoff
- Higher density, requires trained operators
Very-narrow-aisle turret truck
- Common aisle range
- Often under 8 feet, depending on system
- Typical use case
- High-bay storage with guided equipment
- Layout tradeoff
- High density, higher equipment and floor requirements
Pallet jack or walkie
- Common aisle range
- Varies by pallet and traffic
- Typical use case
- Staging, short travel, floor-level picking
- Layout tradeoff
- Low cost, limited lift height
Do not design aisles to the minimum number on paper without accounting for real-world tolerance. Rack row alignment, column guards, building columns, sprinkler drops, floor joints, and traffic at aisle intersections all reduce usable space. In selective rack layout, the main travel aisles are often wider than storage aisles because they carry cross traffic and turning movements.
Optimizing the Dock Interface
The dock interface is a critical junction where goods enter and exit the warehouse. Efficient dock layout minimizes demurrage charges and reduces handling time. This involves strategic placement of staging areas, cross-docking zones, and clear pathways for inbound and outbound traffic.
Consider the volume of incoming and outgoing shipments, the types of vehicles used for transport, and the necessary equipment for unloading and loading. Adequate dock door count and clear access contribute significantly to smooth operations.
A common mistake in warehouse layout optimization is using every square foot near the dock for rack. Dock space looks like wasted space on a drawing, but it is where trailers are unloaded, freight is checked, orders are staged, exceptions are handled, and carriers are kept moving. If staging is too small, pallets spill into aisles, block emergency paths, and force operators to rehandle product.
Plan dock areas by process. Receiving may need space for inspection, labeling, stretch-wrap removal, pallet exchange, and damaged goods. Shipping may need lanes by route, carrier, customer, or appointment time. Cross-docking needs a direct path from inbound to outbound without sending freight deep into storage.
For a practical check, estimate the number of pallets staged at peak, not average. If outbound shipping regularly stages 80 pallets before pickup, the layout must support those pallets plus travel aisles and access to doors. A 40-inch by 48-inch pallet consumes more than its footprint when placed in a staging lane because operators need room to maneuver and identify loads.
Good dock design also separates pedestrian activity from forklift travel wherever possible. Painted walkways, guardrail, bollards, rack protection, and clear signage reduce confusion. The best rack layout cannot compensate for a congested dock face.
Implementing Effective Flow Patterns
Defined flow patterns are essential for minimizing congestion and maximizing productivity. Common patterns include U-shaped, L-shaped, and straight-through flows. A U-shaped flow, where receiving and shipping docks are on the same side, is often effective for smaller facilities or those with limited access points.
L-shaped and straight-through flows are better suited for larger operations, often separating receiving and shipping functions. The chosen pattern must accommodate material-handling equipment, personnel movement, and the sequence of material-processing steps.
Warehouse flow should reduce touches. Each time a pallet is dropped, moved, staged, and moved again, labor cost increases and damage risk rises. In a clean layout, inbound product moves from receiving to reserve storage, forward pick locations, quality hold, or outbound staging with as few crossovers as possible.
A simple way to test warehouse flow is to trace the path of the highest-volume items. Fast movers should not require long travel distances or repeated aisle crossings. Slow movers can often be placed farther from the dock or in higher rack levels. Heavy or difficult-to-handle items are usually better kept low, closer to the shipping path, and in locations that reduce turning and backing.
Slotting and travel distance
Slotting is the process of assigning SKUs to locations based on activity, size, weight, compatibility, and replenishment needs. It is a major part of warehouse layout optimization because travel time is often one of the largest labor components in a warehouse.
A basic slotting approach groups inventory into velocity classes:
| SKU class | Typical characteristics | Preferred layout location |
|---|---|---|
| Fast movers | High order frequency, frequent replenishment | Near shipping, pick modules, or main travel aisles |
| Medium movers | Regular activity but less frequent | Standard selective rack positions |
| Slow movers | Low activity, long dwell time | Farther aisles, higher levels, or dense storage areas |
| Oversized or heavy items | Special handling, weight concerns | Low beam levels, wider aisles, near equipment access |
Fast movers
- Typical characteristics
- High order frequency, frequent replenishment
- Preferred layout location
- Near shipping, pick modules, or main travel aisles
Medium movers
- Typical characteristics
- Regular activity but less frequent
- Preferred layout location
- Standard selective rack positions
Slow movers
- Typical characteristics
- Low activity, long dwell time
- Preferred layout location
- Farther aisles, higher levels, or dense storage areas
Oversized or heavy items
- Typical characteristics
- Special handling, weight concerns
- Preferred layout location
- Low beam levels, wider aisles, near equipment access
As a worked example, assume a warehouse has 1,000 pallet positions and 100 SKUs. If 15 SKUs account for a large share of daily picks, those SKUs should not be scattered across the far end of the building. Moving them closer to the dock may reduce only a minute or two per pick cycle, but multiplied across shifts, operators, and weeks, that layout decision becomes meaningful.
FIFO vs. LIFO Storage Strategies in Layout
The choice between first-in, first-out (FIFO) and last-in, first-out (LIFO) significantly influences warehouse layout. FIFO is crucial for perishable goods, products with expiration dates, or those subject to obsolescence. Drive-through rack, pallet flow, and carton flow systems are ideal for FIFO.
LIFO is suitable for nonperishable items or those where inventory turnover is less critical. Drive-in rack and push-back rack systems are common LIFO solutions. Your product characteristics dictate which strategy and, therefore, which racking system is most appropriate for a given area.
Selective rack is often the default choice because it provides direct access to every pallet position. That access is valuable for broad SKU counts, mixed pallets, variable demand, and operations where operators must reach any pallet without moving another. The tradeoff is lower warehouse storage density compared with deeper systems.
Dense systems increase pallet positions per square foot but reduce selectivity. Drive-in rack can store many pallets of the same SKU in a compact footprint, but it works best when lanes are filled and emptied in a disciplined sequence. Push-back rack improves density while allowing several pallets deep, but each lane still works on LIFO. Pallet flow supports FIFO and high throughput, but it requires careful design of pitch, brakes, pallet quality, and load consistency.
The decision should be made by SKU behavior, not preference. A warehouse with many SKUs and low pallet quantities per SKU usually benefits from selective rack. A facility with large quantities of the same SKU may justify drive-in, push-back, or pallet flow in dedicated zones. Many warehouses use a hybrid pallet rack configuration: selective rack for broad access, push-back for medium-density reserve, and flow lanes for high-volume FIFO items.
Considering Vertical Space and Storage Density
Maximizing vertical space is key to optimizing warehouse density. Utilizing the full clear height of your facility through very-narrow-aisle (VNA) systems, multi-level mezzanines, or high-bay racking can substantially increase storage capacity without expanding the footprint.
Density must be balanced with accessibility. While VNA systems offer high density, they require specialized equipment and slower retrieval times. Standard selective rack offers excellent accessibility but lower density. The optimal balance depends on inventory characteristics and throughput requirements.
Vertical planning starts with clear height, not roof height. Clear height is the usable height below joists, lights, sprinklers, ductwork, and other obstructions. Beam elevations must also consider pallet load height, pallet overhang, lift-off clearance, sprinkler clearance, and operator visibility. Trying to squeeze in one extra beam level without enough handling clearance can slow every putaway and increase product damage.
Rack configuration details that affect capacity
Small rack decisions have a large effect on layout performance:
| Design factor | Why it matters |
|---|---|
| Beam length | Determines how many pallets fit per bay and affects upright loading |
| Upright depth | Must support pallet depth while allowing safe front and rear overhang |
| Beam elevation | Sets usable opening height and number of storage levels |
| Frame capacity | Must match total beam loads applied to the upright frame |
| Row spacing | Affects flue space, pallet overhang, and fire protection needs |
| Tunnel bays and cross aisles | Improve access but reduce total pallet positions |
Beam length
- Why it matters
- Determines how many pallets fit per bay and affects upright loading
Upright depth
- Why it matters
- Must support pallet depth while allowing safe front and rear overhang
Beam elevation
- Why it matters
- Sets usable opening height and number of storage levels
Frame capacity
- Why it matters
- Must match total beam loads applied to the upright frame
Row spacing
- Why it matters
- Affects flue space, pallet overhang, and fire protection needs
Tunnel bays and cross aisles
- Why it matters
- Improve access but reduce total pallet positions
For example, a two-pallet-wide bay may be the right choice for heavy loads or mixed SKUs, while a three-pallet-wide bay may improve storage efficiency for consistent 40-inch-wide pallets. The better option depends on load weight, pallet condition, forklift handling, and beam capacity. Layout should be reviewed with rack capacity needs early, because changing beam lengths after the design is set can affect row count, aisle alignment, and total storage positions.
Fire protection and building code constraints also influence storage density. Rack height, commodity classification, flue spaces, aisle widths, and in-rack sprinkler requirements can all change what is practical. A layout that looks efficient on a plan may be expensive or difficult to approve if it ignores these constraints.
Why Dealers Choose NAWL Quick Ship
NAWL understands the urgency of warehouse projects. Our Venus, TX, facility maintains a robust inventory of pallet-rack components, ready for immediate dispatch. This quick-ship capability allows our dealers to respond rapidly to customer demands, minimize project lead times, and secure more business.
We prioritize dealer success by providing not just quality products but also the logistical support necessary to keep your projects on schedule. This commitment to prompt fulfillment is a cornerstone of our dealer partnerships.
For dealers, layout changes often come with compressed timelines. A customer may sign a lease, win a new account, add production, or need to replace damaged rack quickly. When common pallet rack components are available from stock, dealers can quote faster, schedule installation sooner, and reduce the risk of a project waiting on material.
Quick-ship availability is especially useful for standard selective rack layout projects, rack additions, damaged component replacement, and phased warehouse expansions. It also helps when a customer approves a design but needs final adjustments after field measurements. Being able to source uprights, beams, and related components quickly can keep the project moving.
Dealers should still confirm the project requirements before ordering: frame height and depth, beam length and capacity, color or finish expectations, connector style, row spacers, anchors, protectors, and any accessories required for the application. Accurate takeoffs reduce freight issues, installation delays, and jobsite rework.
Installation and inspection considerations
A strong warehouse design guide should include installation realities. Rack must be installed plumb, level, and anchored according to the project requirements and applicable instructions. Slab condition matters. Cracked concrete, thin slabs, slopes, embedded utilities, and expansion joints can all affect anchor placement and rack performance.
After installation, inspect the system before loading. Confirm beam locks are engaged, anchors are installed, row spacers are in place where required, and aisles are clear. Load capacity plaques should reflect the approved rack configuration so operators know the maximum load per beam level and bay. If beam elevations change later, the capacity may need to be reviewed again.
Ongoing inspections should look for bent uprights, damaged braces, missing safety clips, loose anchors, overloaded beams, poor pallet placement, and impact damage at aisle ends. End-of-row protection and upright guards are often a practical investment in high-traffic areas. Damage that looks minor can reduce capacity, so questionable components should be evaluated before the rack is returned to service.
Common warehouse layout mistakes
Several layout mistakes appear again and again:
- Designing to average volume instead of peak volume.
- Choosing maximum density when the operation needs selectivity.
- Leaving too little dock staging space.
- Ignoring building columns until after rack rows are drawn.
- Using aisle widths that do not match the actual forklift fleet.
- Placing fast movers far from shipping.
- Forgetting cross aisles, pedestrian routes, and emergency access.
- Failing to reserve space for returns, damaged goods, supplies, batteries, chargers, or maintenance.
- Treating rack capacity and layout as separate decisions.
The best layouts leave room for change. Inventory mix, customer requirements, labor availability, and equipment fleets shift over time. A layout that supports today’s operation while allowing future rack additions, re-slotting, or equipment changes will usually outperform a design that only maximizes the first installation.
FAQ
What is the primary goal of a good warehouse layout?
The primary goal is to optimize workflow, maximize storage density, improve operational efficiency, and reduce labor costs by minimizing travel time and preventing bottlenecks. A good layout also supports safe traffic patterns, clear staging, accurate picking, and practical future growth.
How does product type influence warehouse layout?
Product type dictates storage strategy (FIFO vs. LIFO), handling requirements, and the necessary racking systems. Perishables require FIFO, while durable goods may allow for LIFO. Product weight, pallet quality, stackability, expiration dates, and SKU count all affect the final layout.
Can I combine different racking systems in one warehouse layout?
Yes, it is common and often beneficial to combine different racking systems to accommodate varied product types, inventory turnover rates, and handling requirements within a single facility. Selective rack, push-back, drive-in, pallet flow, and carton flow can each serve a different zone.
What are common mistakes to avoid in warehouse layout?
Avoid insufficient aisle widths, inadequate dock space, unclear traffic lanes, lack of dedicated staging areas, and failing to plan for future growth and product changes. Also avoid designing rack before confirming forklift requirements, pallet dimensions, clear height, and slab conditions.
How often should a warehouse layout be reviewed or revised?
Warehouse layouts should be reviewed periodically, at least every 3-5 years, or whenever there are significant changes in inventory volume, product mix, or operational processes. A review is also useful after adding new equipment, changing carriers, or introducing new picking methods.
What information is needed before starting a pallet rack layout?
Start with building drawings, clear height, column spacing, dock locations, pallet dimensions, load weights, forklift specifications, SKU count, inventory turns, and required storage positions. These details help determine aisle width, rack configuration, and storage density without unnecessary redesign later.
Ready to spec a system? Request a quote and our team will size it with you.